
This post is part of a series, for the series contents see: Azure MFA
Permissions
With all the vital components in place I can now MFA enable a user but in order to do so I need an account with Global Admin rights over my Azure AD.
I think this is pretty ridiculous because, for me, enabling/disabling users for MFA should be a standard first line help desk activity and I reckon most organisations won’t be giving their first line teams full Global Admin rights. It doesn’t really fit within a role based access model. I raised it with Microsoft and, thankfully, was told that more granular permissions are on the way by the end of the year (2017 at the time of writing) so, hopefully soon, if not already, it’ll be possible to give MFA enablement rights to custom admin roles or those permissions will be added into the user administrator role.
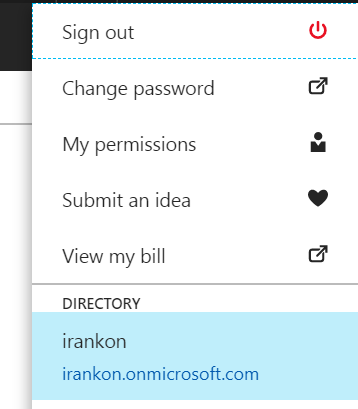
In my case I decided to give my test “itadmin” account those rights so I logged into the portal and changed to my irankon directory.
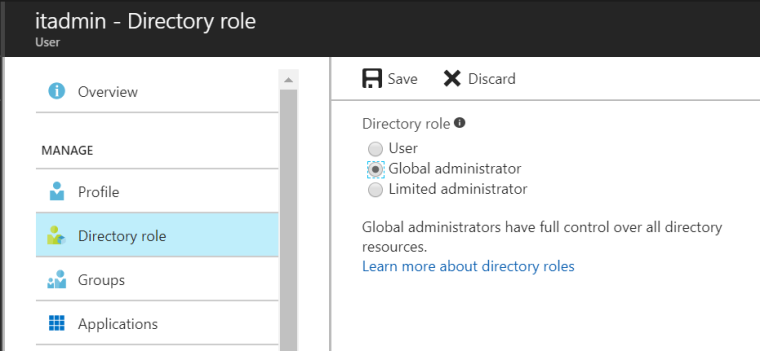
Then I went to my itadmin user and in the roles section gave them full Global Admin rights:
Enabling a User
The first step is to get connected up to Azure AD
#Get connected up to Azure AD using Global Admin Credentials
Import-Module MSOnline

$Credential = Get-Credential

Connect-MsolService -Credential $Credential
Next up, define the authentication options, including setting MFA to be enabled:
#First define auth options
$auth = New-Object `
-TypeName Microsoft.Online.Administration.StrongAuthenticationRequirement
$auth.RelyingParty = "*"

#Set the option to enable MFA
$auth.State = "Enabled"

#Set MFA so that as of the current date
#devices issued to the user will also require MFA
$auth.RememberDevicesNotIssuedBefore = (Get-Date)
Then, finally, let’s bring it all together to enable our itadmin user:
#Next define our user and enable them for MFA $UserPrincipleName = "itadmin@irankon.tk" Set-MsolUser ` -UserPrincipalName $UserPrincipleName ` -StrongAuthenticationRequirements $auth
Now when “itadmin” next logs in they will be prompted to set themselves up with a second factor of authentication.
Disabling Users
This is going to be short and sweet!
To disable a user for MFA you just need to clear their “StrongAuthenticationRequirements” setting:
#Disable the user: Set-MsolUser ` -UserPrincipalName $UserPrincipleName ` -StrongAuthenticationRequirements @()
Licensing Users
As mentioned before there are pretty much three ways to sort out your Azure MFA licensing:
- Purchase MFA specific licenses and assign them to your users. With this method you don’t need to create a cloud based MFA provider, in fact, if you do, you could end up paying twice.
- Purchase license bundles that include MFA such as Azure AD Premium (P1 or P2), E5, or EMS + Security E3 licenses. Again, with this method you don’t need to create a cloud based MFA provider.
- Setup a cloud based MFA provider and pay on an Opex/Capacity basis, either per user using that provider or per authentication.
There’s a Microsoft article that probably explains it better than I do here.
If you’re doing either of the first two options then you’re going to want to give your users a license so here’s the PowerShell for that.
First of all, you will want to check the licenses you have available to you by running:
#Verify what licenses you have with:
Get-MsolAccountSku
Results will be returned in the format domain:licenseSKU so, for example:
irankontk:MFA_STANDALONE
You can then add that license SKU to a user with:
Set-MsolUserLicense `
-UserPrincipalName $UserPrincipleName `
-AddLicenses “irankontk:MFA_STANDALONE”
With some of the more complex license packs, such as EMS, you might want to add just one part of that pack but not the rest. To do that you need to define some license options that identify the bits you want to exclude:
#Define the options we want, in our case MFA only
$licenseOptions = New-MsolLicenseOptions `
-AccountSkuId irankontk:EMS `
-DisabledPlans RMS_S_PREMIUM,INTUNE_A,RMS_S_ENTERPRISE,AAD_PREMIUM
Then use those exclusions when adding a license to a user:
#Apply a license using those options
Set-MsolUserLicense `
-UserPrincipalName $UserPrincipleName `
-AddLicenses irankontk:EMS `
-LicenseOptions $licenseOptions
And that’s it. I’ll post a tool belt style script in an upcoming entry that puts the licensing and enablement code into functions so it can be run against batches of users to setup them up.
